Do you have a favorite pair of earbuds that are old enough to retire? If so, then the DIY repairing earbuds with soldering are for you. This blog post will show you how to fix your broken earbud wires and make them as good as new ones. The first step is identifying which wire is the problem. Once this has been done, cut off one of the wires from each side and solder it back together. It’s also important to know what type of wire you’re working with because not all types can be used for this repair. In addition, please note that if your wires aren’t copper coated, then they cannot be repaired using these instructions. After that’s been taken care of, re-wrap both.
Easy ways to fix broken earbuds with soldering
This is a step-by-step guide for repairing earbuds with soldering. This might be useful to people looking to fix their headphones or save some money on replacements. The process will require the use of tools such as solder, flux, and tweezers. It’s important to get all of these supplies before beginning this project because it can get difficult if you have to stop midway through to gather more materials you need.
If you’re like me and use your earbuds at least once a day, it can be frustrating when the wire gets tangled, or they break. You may think that repairing them is too difficult to do yourself, but this blog post will show you how easy it is.
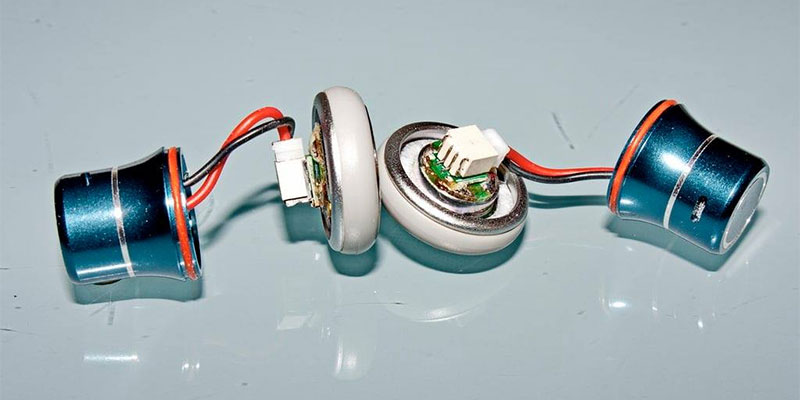
We’ll start by using a soldering iron (or some other metal that melts) to fix any broken wires in the cord. After that, we’ll create new earbud tips or replace old ones with foam tips. We’ll finish up by adding shrink tubing over the soldered parts of the cord for added protection from tangling and breaking.
Bring your earbuds back from the dead
Do you have a pair of earbuds that need to be repaired? This quick and easy DIY guide will show you how to do it.
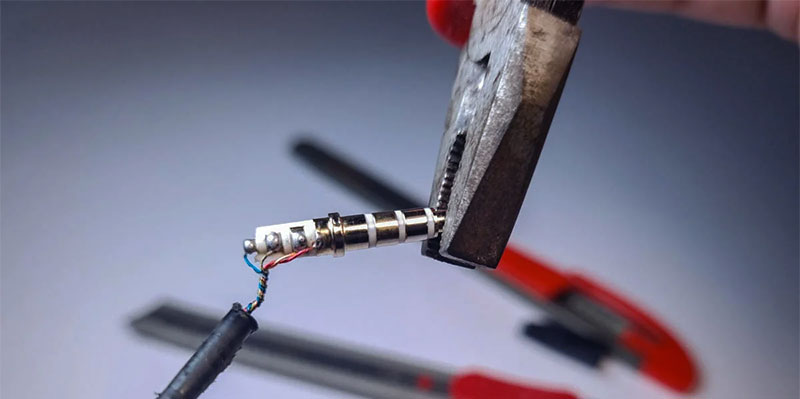
- Step 1: Gather materials needed- soldering iron, solder wire, flux pen, needle nose pliers, or tweezers
- Step 2: Clean the wires with the flux pen
- Step 3: Apply solder on one side of the broken wire and wait to cool down before applying it on the other side of the broken wire.
- Step 4: Wrap with tape when finished.
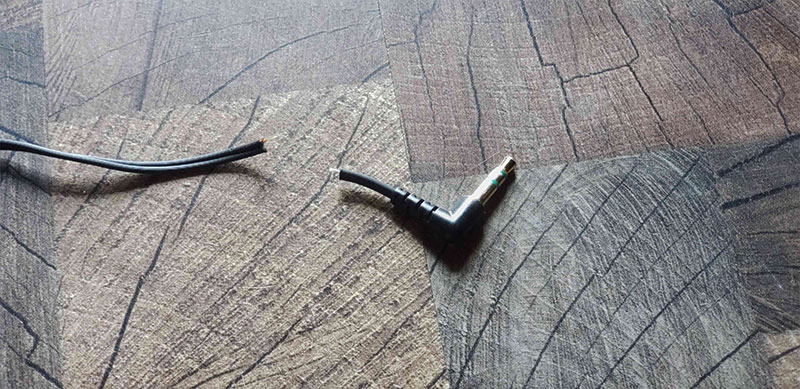
If you have a broken pair of earbuds that need repair, try this quick fix yourself. I’ll show you how to do it! You will need Soldering Iron, wire cutters, pliers, and electrical tape. First, disconnect the two wires on your earbud by cutting them with wire cutters or pliers. Next, twist together the exposed copper parts of each wire, so they form a loop before taping them together with some electrical tape for safety. Now connect one end of the new loop to one side of the plug and solder it down using your soldering iron. Repeat these steps for all three connections (two on one side and one on the other).